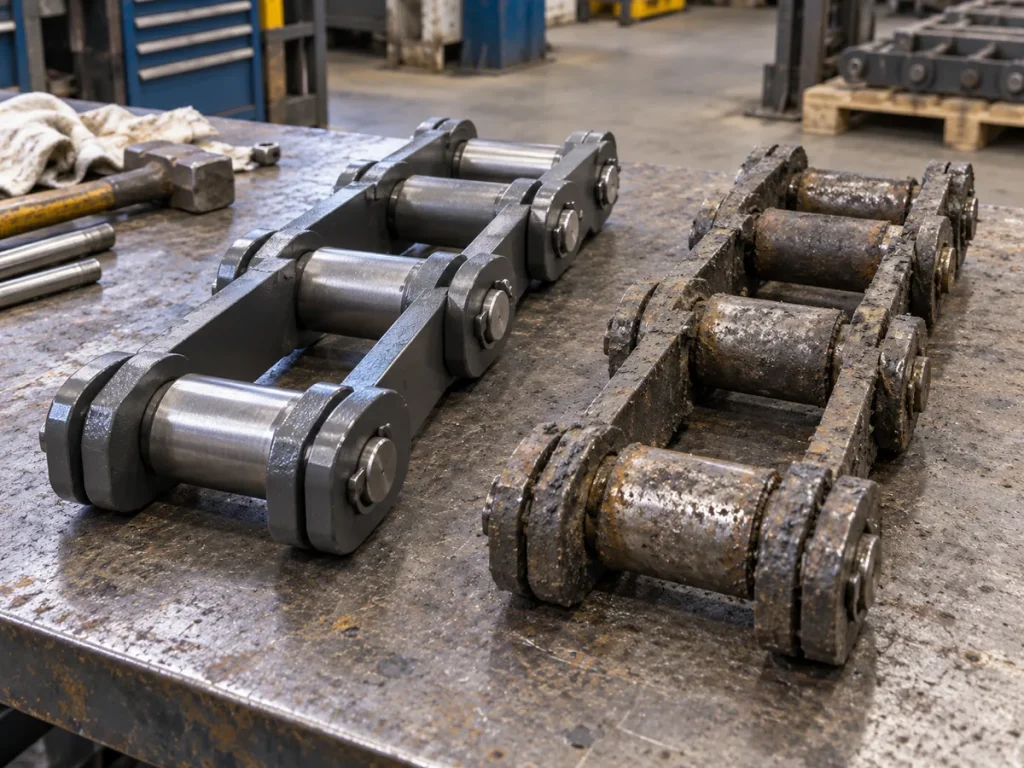
How to Measure Feeder Breaker Chain Pitch on an Installed Chain
Measure feeder breaker chain pitch consistently on an installed chain, record reference points, and separate field readings from nominal specs.
Engineering GuideUpdated septembre 16, 2026
Pitch is one of the first dimensions maintenance teams reach for when an underground feeder breaker chain has no reliable part number. It is also one of the easiest dimensions to record badly. A single center-to-center reading taken across a dirty, articulated, or heavily worn joint can look precise while still being poor identification evidence. The objective is therefore not to produce one number as quickly as possible. The objective is to create a repeatable measurement record that another engineer, purchaser, or supplier can understand and verify.
For a feeder breaker scraper chain, the measured pitch should be treated as one piece of the configuration. The same nominal pitch can occur in different assemblies, and the surrounding geometry can change the replacement decision. On this site, K201B and K207B are both documented at a nominal 3 1/2 inch pitch, yet their scraper widths and component structures are different. That makes them a useful reminder that pitch narrows the search but does not finish it.
The method below is written for identification and RFQ preparation, not for setting a universal wear limit. Before touching the chain, follow the machine manufacturer’s isolation, stored-energy, and access procedures. If the chain cannot be positioned or tensioned safely for measurement, record what is accessible and escalate the remaining work through the site maintenance procedure rather than improvising around a hazardous machine.
Measure
Choose repeatable pin or joint reference points and span several pitches when access allows.
Record
Keep the raw span, number of pitches, location, chain condition, unit system, and photographs together.
Verify
Compare the field evidence with the approved drawing or listed model; do not convert a worn reading into a nominal specification by assumption.
1. Establish a Safe, Repeatable Measurement Location
Start by deciding which physical section of chain will become the measurement reference. Prefer an intact run where the joints, plates, and pins are visible and where material build-up does not hide the contact points. Avoid using a bent flight, obviously damaged joint, field-welded repair, or an area sitting at an unusual angle unless that condition is the subject of the inspection. If only a damaged area is accessible, record that limitation so the value is not later mistaken for a normal reference.
Location identity matters. “Measured on the chain” is not enough for a repeat inspection. Record the feeder breaker, side or strand, approximate position in the chain loop, and a nearby visual landmark. A simple tag such as “left strand, three repeating units upstream of discharge sprocket” can be more useful than an unlabeled photograph. If both strands are accessible, keep their records separate; do not average them before checking whether the geometry is actually comparable.
2. Choose the Reference Points Before Reading the Tape
Pitch is a repeating joint-to-joint distance, so the first control is consistency. Use equivalent features at both ends of the measurement. For many engineering chains, a pin-center reference is conceptually clear, but field access may make exact centers difficult to see. An alternative is to use a consistent pin-end or plate feature if the same geometry is used at both ends. The record should state the chosen reference instead of leaving the reviewer to infer it from a number.
Do not place one end of the tape at a pin center and the other at a plate edge, bolt, scraper edge, or other convenient feature. That produces a dimension that has no defined relationship to pitch. If grease, coal fines, or scale hides the reference, clean only under the approved maintenance procedure and photograph the condition before and after cleaning when contamination itself may be relevant to the inspection.
3. Measure Several Consecutive Pitches When Possible
A multi-pitch span is normally more useful than a one-pitch reading because the same endpoint placement error is spread across several repeating joints. Select two equivalent endpoints several pitches apart, count the number of pitch intervals between them, and record the total measured span. Divide the span by the counted pitch intervals only as a field observation. Keep the total span in the record; the total is the measurement that can be rechecked later.
For example, if a technician spans six pitch intervals, the inspection sheet should preserve “six pitches, endpoint A to endpoint B, measured total = ___” rather than saving only a calculated per-pitch figure. A second technician can then repeat the same span and see whether a difference came from endpoint choice, count, chain position, or calculation. Do not publish a universal minimum number of pitches for this feeder breaker chain; access and the controlled inspection procedure determine what can be measured safely.
Pitch measurement record fields
Field
What to record
Why it matters
Chain location
Machine, strand/side, and repeatable physical location
Allows the same area to be found again.
Reference points
Exact features used at both measurement endpoints
Prevents mixed pin/plate references.
Pitch count
Number of intervals inside the measured span
Required before deriving any observed per-pitch value.
Explains limitations without inventing a specification.
Photo IDs
Overall and close-up image references
Lets reviewers verify endpoint placement.
Record rule
Keep the raw measurement even when a calculated pitch is added; never replace the field record with a rounded nominal value.
4. Keep Nominal Pitch and Observed Pitch in Different Fields
A field reading answers “what distance did we observe under these conditions?” A nominal pitch answers “what pitch is specified for the design?” Those are not automatically the same field. Wear at the pin-and-bush articulation, debris, chain posture, measurement force, endpoint visibility, and simple reading error can change the observed result. If the chain is being identified, write the field measurement first and compare it with nominal data afterward.
The distinction is especially useful with the documented feeder breaker models on this site. K201B is listed at 3 1/2 inches with a metric value of 89 mm, while K207B is listed at 3 1/2 inches with a metric value of 88.9 mm. Preserve those technically specified values as model data. Do not rewrite a field measurement to make it match either model, and do not silently “correct” one documented metric value to the other. The identification process should show where the evidence agrees and where it does not.
Hauteur nominale
The design pitch stated by an approved drawing or listed model data.
Observed pitch
A field-derived value calculated from a measured multi-pitch span under stated conditions.
Reference point
The physical feature used to define each end of a measurement.
Repeating unit
The larger assembly pattern that may combine chain sections and a flight section and therefore adds identification evidence beyond pitch.
5. Add Width, Unit Length, and Flight Evidence Before Naming the Chain
Once pitch has narrowed the candidate family, move immediately to dimensions that separate plausible configurations. Record the repeating chain unit length, scraper or flight width, spacing and orientation of flights, link arrangement, and visible component details. These dimensions are valuable because two chains can share nominal pitch and still be unsuitable substitutes.
K201B and K207B demonstrate the point. Both are documented as 3 1/2 inch feeder breaker scraper chains with a 21 inch repeating chain unit described as one Flight Section and two Chain Sections. Yet K201B has a documented scraper width of 44 2/5 inches, whereas K207B is 46 inches. K207B also includes a documented Scraper Outer Link and an Extended Pin in its component tree. A pitch-only identification would miss those differences.
6. Photograph the Measurement So the Number Has Context
Take at least one photograph wide enough to show where the measurement sits in the repeating assembly and one close view where both endpoints can be recognized. If a ruler or tape is visible, place it so the scale is readable without covering the joint feature being referenced. A photo is not a substitute for the written measurement, but it prevents many later questions about which pin, face, or link was used.
Also photograph the general condition around the measured span. Brightly polished side contact, packed material, bent attachments, obvious repairs, or unusual articulation can help explain why a field value differs from an old drawing. Keep those observations descriptive. The photo record should not jump from “wear visible” to a discard decision unless the approved machine or chain specification supplies the acceptance criterion.
7. Turn the Reading into a Controlled Identification Record
Finish by assembling the evidence in one line of control: machine context, chain location, reference-point definition, counted pitches, total span, calculated observed pitch if used, unit system, chain condition, photographs, and comparison document. If the model remains uncertain, label it “unconfirmed” and list the dimensions still required. That is a stronger engineering record than assigning the nearest listed model because one dimension looks close.
When a purchasing team receives the record, they should be able to distinguish confirmed facts from open questions. A supplier can then compare the measurement with the relevant product data or drawing and request targeted follow-up evidence. That reduces the chance of repeating the entire site survey after the chain has been removed or the shutdown has ended.
Use this handoff checklist to close the field record for How to Measure Feeder Breaker Chain Pitch on an Installed Chain. The goal is not to create another generic maintenance form. It is to preserve the specific observations, reference points and machine context that the next reviewer needs in order to understand how the result was obtained. Keep machine-specific acceptance limits under the approved drawing, maintenance procedure or engineering instruction rather than inventing a universal web value.
Checkpoint
What to record
How the record is used
Establish a Safe, Repeatable Measurement Location
Record the exact machine location, strand or side, current operating/shutdown state, and the observation that relates to establish a safe, repeatable measurement location. Include a photograph that lets another reviewer find the same area.
Establishes the context so later measurements are not detached from the machine and chain position.
Choose the Reference Points Before Reading the Tape
Capture the physical reference used for choose the reference points before reading the tape. Keep the raw dimension, image or marking beside the interpretation, and note any wear, repair, build-up or access limitation that could affect the reading.
Makes the result repeatable and prevents a damaged or poorly defined reference from becoming the replacement requirement.
Measure Several Consecutive Pitches When Possible
Cross-check measure several consecutive pitches when possible against any controlled drawing, previous purchase reference or retained spare that is available. Keep current field data and historical information in separate fields when they differ.
Preserves traceability when field condition, historical records and nominal product information do not agree perfectly.
Keep Nominal Pitch and Observed Pitch in Different Fields
For keep nominal pitch and observed pitch in different fields, state what is confirmed, what is only observed, and what still needs engineering confirmation. Attach the image or measurement that supports the statement rather than relying on a product name alone.
Gives maintenance, purchasing and the supplier a clear list of what can be acted on now and what must be resolved before release.
Separate as-found condition from required replacement geometry. A worn, repaired, dirty or partially dismantled component may still be very useful for identification, but its current shape is not automatically the manufacturing requirement. Label field measurements as observed data, retain the original unit and measurement method, and identify any feature that may have been altered by service. For measure feeder breaker chain pitch, photographs should show the measurement endpoints or component relationship clearly enough that a remote reviewer can reproduce the logic.
Resolve conflicting information instead of hiding it. If a drawing, old order, marking and current measurement point in different directions, keep each source visible and describe the conflict. Do not average values or silently choose the most convenient one. Use additional photographs, measurements from another intact repeating unit, machine interface information and the controlled document revision to determine which value governs. If turn the reading into a controlled identification record cannot be confirmed during the shutdown, state that limitation explicitly so the open question survives the handoff.
Make the next action obvious for How to Measure Feeder Breaker Chain Pitch on an Installed Chain. The completed record should tell maintenance what should be rechecked, tell purchasing what information belongs in the RFQ, and tell engineering which dimensions or interfaces still need approval. Before the machine returns to service, confirm that the file set includes an overall machine view, a complete repeating chain/flight view, close-ups of relevant components or markings, and the dimensions used in this guide. For measure feeder breaker chain pitch, a traceable set of observations is more useful than a long narrative with no datum, and it reduces the risk that a replacement decision is made from pitch, appearance or an old part number alone.
Questions to Resolve Before the Next Decision
Should I measure one pitch or several?
When safe access permits, a span across several consecutive pitches gives a more repeatable field record because endpoint placement error has less influence on the derived per-pitch figure. Keep the full span and the pitch count in the record.
Can I identify K201B or K207B from a 3.5 inch measurement?
No. Both listed models share a nominal 3 1/2 inch pitch. Compare unit length, scraper width, flight arrangement, component structure, and the machine context before confirming the model.
What if the installed chain does not sit straight enough for a clean measurement?
Record the limitation and use the machine maintenance procedure to determine whether the chain can be repositioned safely. Do not force the chain into a condition that creates stored-energy or access risk simply to obtain a web-guide measurement.
Should I convert the measurement between inch and metric?
You may record both units, but preserve the original reading and show the conversion separately. This prevents a rounded conversion from replacing the field evidence.
Next Step: Close the Measurement Record
A reliable pitch measurement is not just a number. It is a traceable observation tied to a location, two defined reference points, a known number of pitch intervals, a raw span, and supporting photographs. That record can then be compared with nominal data without pretending the field chain is unworn or perfectly positioned.
For feeder breaker replacement work, use pitch to narrow the search and use the rest of the configuration to finish it. If the measured chain cannot be reconciled with a controlled drawing or a listed product such as K201B or K207B, keep the model unconfirmed and send the complete evidence package for engineering review.