Feeder breaker chain tension is machine-specific. There is no single tension value or sag dimension that can be applied safely to every feeder breaker, because chain arrangement, conveyor geometry, sprockets, take-up mechanism, load, and manufacturer procedure vary. This guide explains a general inspection logic for recognising tension-related symptoms and preparing a technically useful maintenance review. The equipment manual and site procedure always take precedence.
Why Tension Matters
The chain must engage with the sprockets and follow the conveyor path without being excessively slack or unnecessarily tight. Incorrect adjustment can be associated with poor tracking, abnormal contact, difficult engagement, or added loading on chain and machine components. Those symptoms are not proof of a single cause, because wear, sprocket condition, misalignment, damaged flights, and contamination can create similar observations.
Tension should therefore be treated as part of a system inspection rather than as an isolated setting.
Before Checking
Follow the feeder breaker manufacturer’s isolation and maintenance instructions before approaching the chain path. Identify the approved inspection position and the adjustment mechanism from the equipment documentation. Do not use this page to bypass a machine-specific safety procedure or stored-energy control.
Before adjustment, record the current condition. Photograph the chain path, visible sag or slack, sprocket engagement where accessible, the take-up or adjustment position, and any abnormal flight contact. If a problem develops later, those records help distinguish a tension change from progressive wear or another mechanical issue.
Visual and Mechanical Signs to Record
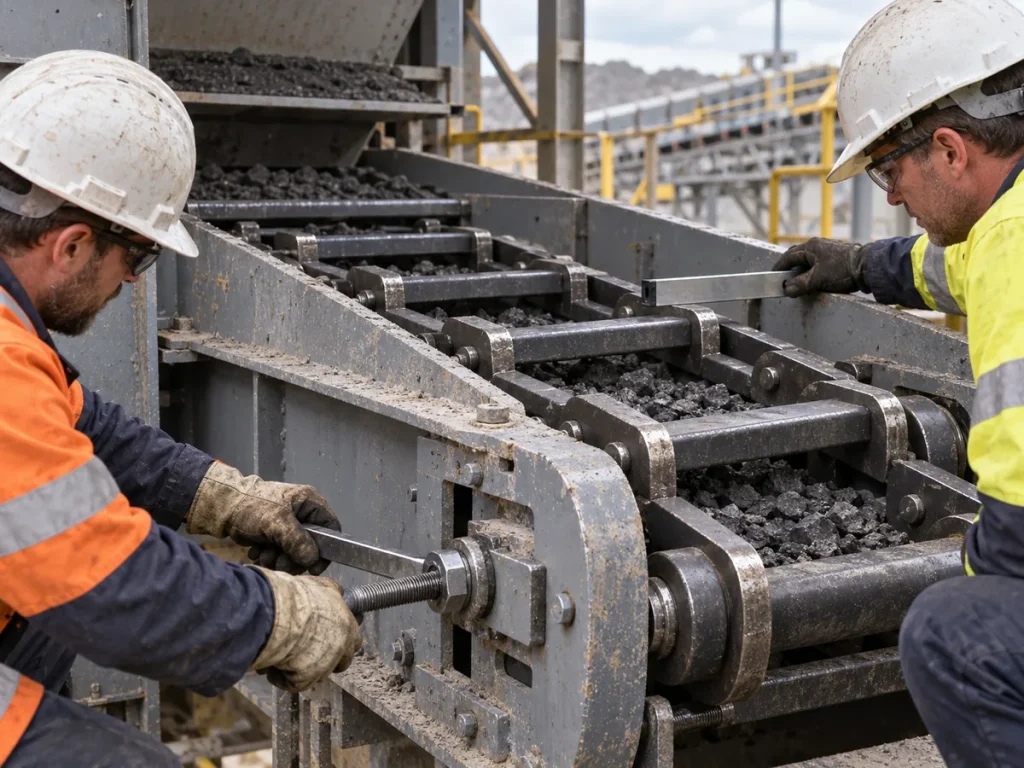


Useful observations include:
- uneven slack between chain strands;
- inconsistent chain tracking;
- a chain that does not seat consistently in the visible sprocket area;
- repeated need for take-up adjustment;
- unusual side contact or polished wear marks;
- damaged or misaligned flight/scraper components;
- unusual operating noise or vibration reported by the maintenance team;
- material build-up that interferes with inspection or movement.
None of these observations defines a universal adjustment amount. They are evidence that the system should be checked against the machine procedure.
High-Level Adjustment Logic
A general sequence is:
- Inspect before adjusting. Look for damaged links, joints, flights, sprocket issues, contamination, or obvious misalignment.
- Identify the machine’s approved take-up mechanism and target condition. Use the manufacturer’s manual or site maintenance instruction.
- Adjust in the prescribed manner. On systems with paired chain paths, keep the adjustment relationship consistent with the machine procedure rather than making an arbitrary one-side correction.
- Verify tracking and engagement. Recheck the chain path and adjustment position using the equipment procedure.
- Re-inspect after the machine has been returned to service under the approved test process. Document the result so future inspections have a reference point.
This sequence intentionally omits numeric tension and torque values because those values are not supported by the selected chain source and vary by equipment.
What Not to Guess

Do not guess a universal sag, take-up position, hydraulic pressure, spring length, torque, or chain tension from a similar-looking machine. Do not copy a value from a shuttle car, bolter miner, apron feeder, or unrelated conveyor. Even within feeder breaker equipment, the adjustment mechanism and acceptable condition can differ.
Do not assume that tightening is the correct response to every slack-looking chain. If the chain has accumulated joint wear, a tension adjustment can change the visible slack without addressing the underlying condition.
When to Inspect Wear Instead
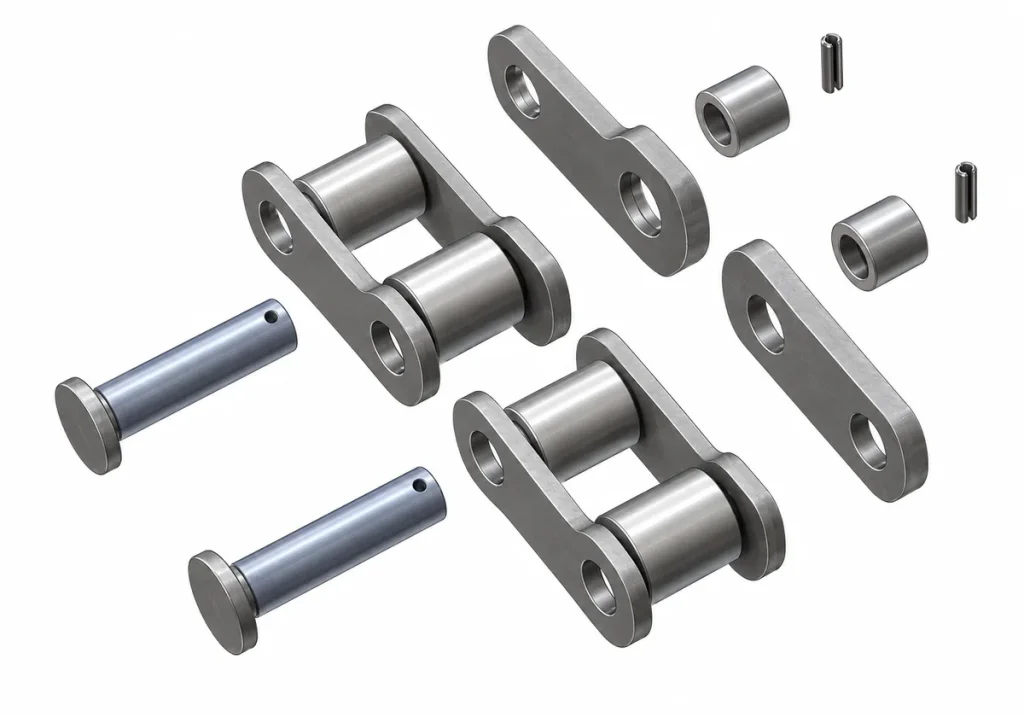
If the chain requires repeated adjustment, will not track normally, cannot achieve the machine’s approved condition, or shows abnormal sprocket engagement, investigate wear and surrounding components. Record pitch/span measurements where the maintenance procedure permits, inspect flight geometry, and document sprocket condition.
When replacement planning begins, capture the chain identity and dimensions before removal. For the K201B and K207B models, the distinguishing information includes pitch, unit length, scraper width, and component arrangement.
Separate Tension Symptoms from Root Cause
A chain that appears loose does not automatically need more take-up. Joint wear, sprocket condition, a damaged flight, guide interference, contamination, unequal strand condition, or an earlier incorrect adjustment can change what the chain looks like. Before changing the setting, record the symptoms and inspect the obvious mechanical condition permitted by the maintenance procedure.
This diagnostic discipline matters because an adjustment can temporarily change visible sag without correcting the reason that the chain no longer behaves normally. If the machine returns to the same condition repeatedly, the adjustment history becomes evidence for a broader wear or alignment review.
Paired-Chain Observations
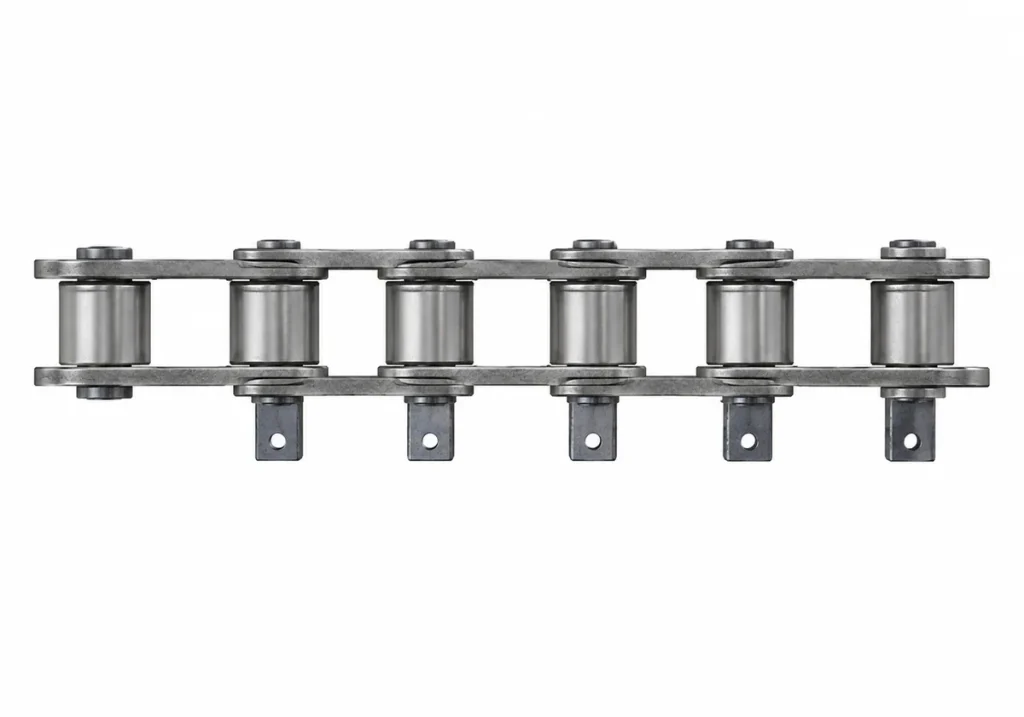
The K Series is described as a double-strand scraper conveyor chain family. On paired-chain systems, compare the two sides rather than judging each strand in isolation. Record whether slack, tracking, flight position, and visible engagement appear consistent between the strands. A difference should be checked against the machine’s approved adjustment procedure and the physical condition of both chain paths.
Do not attempt to equalise two sides by an improvised method. The feeder breaker’s take-up mechanism and alignment procedure determine how the machine should be adjusted. The web guide can only tell you what evidence to preserve before and after that work.
What to Record Before Adjustment
Before changing the machine, capture:
- overall chain-path photographs;
- visible sag/slack condition at the approved inspection point;
- take-up or adjustment reference position if the maintenance procedure records it;
- chain tracking and side-contact evidence;
- visible sprocket engagement;
- flight/scraper alignment;
- obvious damaged components or missing retention features;
- recent adjustment history and any reported operating symptom.
These records provide a baseline. Without them, it is difficult to tell whether the adjustment improved the system or merely moved the visible symptom.
What to Record After Adjustment
Repeat the same photographs and observations. Record the approved adjustment action, the date, the person or work order responsible under the site system, and the result of the machine’s return-to-service check. If the maintenance procedure contains a machine-specific reference value, store it in the maintenance record; do not copy it into a general website or unrelated machine file.
If tracking or engagement remains abnormal, stop treating the problem as a simple tension-setting issue and inspect wear, sprockets, guides, flights, and chain identity.
Tension and Chain Elongation Are Not the Same Thing
Take-up movement can compensate for some accumulated chain length within the machine’s designed adjustment range, but that does not reverse joint wear. A chain can be adjusted to a different take-up position while the underlying pin/bush wear continues to accumulate. This is why adjustment history and dimensional wear records should be reviewed together.
The correct discard or replacement criterion depends on the chain and machine specification. This page intentionally does not publish a percentage or take-up limit.
Tension Questions for an RFQ
A replacement supplier normally does not need the machine’s confidential maintenance settings to identify the chain, but information about repeated adjustment, abnormal tracking, or engagement problems can help explain why a replacement review is being requested. Pair those observations with the chain dimensions: pitch, unit length, scraper width, flight arrangement, and photographs.
If the current chain appears to have reached the end of the machine’s adjustment travel, document that condition under the approved maintenance procedure. Do not infer from it alone that a particular replacement model is correct.
Common Mistakes
Copying a sag value from another conveyor. Similar chain types can use different machine geometry and adjustment methods.
Adjusting before inspecting. The adjustment may hide evidence of wear or misalignment that should have been recorded.
Ignoring unequal strand condition. On paired systems, compare both sides and follow the machine procedure.
Continuing to tighten after repeated recurrence. Repeated adjustment is a reason to investigate wear and engagement, not a reason to keep increasing tension indefinitely.
Treating the take-up position as a chain model dimension. It is a machine condition, not a substitute for pitch, unit length, scraper width, or component identification.
Decision Point: Adjustment or Replacement Review?
If the chain can be brought to the machine’s approved condition and no concerning wear or damage is found, continue to monitor it under the maintenance plan. If the chain cannot be adjusted correctly, repeatedly loses the condition, shows abnormal engagement or damage, or has uncertain identity, prepare a wear and replacement review with complete measurements and photographs.
Tension Troubleshooting Without Inventing a Universal Setting
Because the correct adjustment depends on the feeder breaker and its approved maintenance procedure, troubleshoot the evidence rather than applying a generic number. The table below is a routing aid, not a machine setting.
| Observation | Evidence to Record | Next Check |
|---|---|---|
| Chain condition changes soon after adjustment | Adjustment date/position, photographs, operating observations | Inspect joint/chain condition, engagement, and surrounding machine factors under the approved procedure |
| Unequal condition between paired chain paths | Photos and measurements from both sides | Compare flight alignment, chain condition and adjustment mechanism; escalate asymmetry |
| Irregular engagement at the sprocket | Context and close-up photos of chain/sprocket relationship | Review chain wear evidence and sprocket condition; do not assume chain tension is the only cause |
| Local tight or damaged area | Identify exact chain location and component | Inspect for damage, repair history, build-up or obstruction before further adjustment |
| Adjustment range is nearly exhausted | Record take-up position and chain condition | Prepare wear/replacement review under site criteria rather than continuing repeated adjustment |
| Noise, impact or tracking concern after adjustment | Record when/where it occurs and the chain path | Stop and review according to machine/site procedure if the condition is abnormal or unsafe |
The purpose of this matrix is to prevent a maintenance symptom from being converted into an unsupported numerical prescription. The machine manufacturer and site procedure control the actual adjustment method and acceptable condition.
Document the Condition Before and After Adjustment
Before changing the take-up or adjustment mechanism, record the existing condition. Photograph the accessible chain path, representative joints, flights, and sprocket engagement. Note the adjustment position or reference used by the machine procedure. If the chain is paired, document both sides.
After the adjustment, repeat the same observations. This produces a before/after record that can be compared at the next inspection. If the condition returns quickly, the team can see whether the adjustment changed the symptom temporarily or whether there is a broader wear, alignment, engagement, or component issue that requires review.
Do not use the take-up position as a substitute for chain identity. A replacement RFQ still needs the chain model or measured geometry, including pitch, repeating unit length, scraper width and relevant flight/component details.
When to Escalate Instead of Adjust Again
Escalate the issue for maintenance or engineering review when the chain cannot be brought to the machine’s approved condition, the same adjustment is repeatedly required, a paired arrangement remains unequal, the chain shows visible damage, the sprocket engagement appears abnormal, a flight is damaged or misaligned, or the chain identity itself is uncertain. Site safety and machine procedures take priority over continued adjustment.
For sourcing purposes, repeated adjustment can be a useful trigger to prepare the evidence for a replacement review, but it is not by itself proof that the chain has reached a universal wear limit. Collect the history, measurements, photographs and drawing references so the condition can be evaluated in context.
Adjustment History as Engineering Evidence
Keep a chronological log rather than only the most recent setting. Record the date, reason for inspection, adjustment reference, observations before and after, parts repaired or replaced, and follow-up result. Where the site procedure includes a specific measurement, retain that value with the method used.
Over time, this history can show whether the chain condition is stable, changing gradually, or recurring after intervention. It can also reveal whether one side of a paired system behaves differently. The record supports a more informed maintenance discussion without requiring this website to invent a tension value for a machine it has not inspected.